unhurried

コンピュータ関連ネタがほとんど、ときどき趣味も…

Assign Zone Apex Domain to AWS ELB (ALB)

What is zone apex?

Zone apex means a simplest domain, which is not a sub domain. For example, if we own a domain "example.com", "www.example.com" is not a zone apex, but "example.com" is a zone apex.

CNAME can not be configured to zone apex

If we use a DNS server outside AWS instead of using Route53, which is a DNS service from AWS, we need to configure the domain name of ELB(ALB) as CNAME record of the domain. However, this configuration may not work correctly because it violates the specification written in RFC1912.

Use an alias record of Route 53

Consequently we can't use outside DNS servers in this case, and have to use the function provided by Route53 which is called "alias record". Alias records can be configured like CNAME records, and behave like A records. (Route53 will resolve the IP address of the CNAME record and return the IP address as an A record response.)

Reference

AWS ELB(ALB)にZone Apexドメインを設定する

Zone Apexとは?

Apexは頂点、先端という意味で、wwwなどのサブドメインのつかないドメインを意味します。 example.comというドメイン保有している場合、www.example.comはZone Apexではなく、example.comはZone Apexとなります。

Zone ApexにはCNAMEを設定できない

ドメインDNSサーバーを、AWSDNSサービスであるRoute53を使わずに外部に用意していた場合、DNSレコードにはELB(ALB)のドメイン名をCNAMEレコードとして設定する必要があります。 ところが、RFC1912に記載される仕様上、この設定が正しく動作する保証がありません。

Route 53のエイリアスレコードを利用する

結局のところ、この場合には外部のDNSサーバーは利用できず、Route53で提供されるエイリアスレコードという機能を使うしかありません。
エイリアスレコードはCNAMEのように定義でき、実際の動作上はAレコードのように振る舞う仕組みです。(DNS応答の際にCNAMEレコードのドメインIPアドレスを解決して、そのIPアドレスをAレコードとして応答します。)

参考

How to cope with Callback Hell #3 aa

This time I have researched aa which was introduced in Qiita (Japanese website). aa is another library like co and utilize Generator mechanizm to make it easier to wirite parallel ans serial flows. aa has some advantages to co, that is thunkify and promisify are included in the same package, and it has thunkifyAll and promisifyAll which enable affecting all the objects. However, aa doesn't have a function equivalent to co.wrap, so it is a little inconvenient to write a yieldable function which uses parallel and serial flows.

const aa = require('aa');

// An object which has a function whose argument is callback.
var callbackObject = {
  func: function(message, timeout, callback) {
    setTimeout(function() {
    console.log(message);
      callback(null, message);
    }, timeout);
  }
};

// aa.promisifyAll will apply promisify to the whole object.
// promisify converts a fucntion whose argument is callback to one returning a Promise.
// yeild can be applied to Promise in generator (yeildable).
var promisifiedObject = aa.promisifyAll(callbackObject);

// As with co when Generator (function*(){...}) is passed to aa function,
// aa will resume the process after the Promise is finished.
aa(function*() {
  console.log('--- aa start ---');
 
  // Process two functions parallely.
  // Specify Array or Object to yield to do a parallel process.
  var response = yield [
    promisifiedObject.funcAsync('aa two', 800),
    promisifiedObject.funcAsync('aa one', 600),
  ];
  console.log("response: " + JSON.stringify(response));

  // Process two function serially.
  yield promisifiedObject.funcAsync('aa three', 200);
  yield promisifiedObject.funcAsync('aa four', 400);
 
  // Call a function using aa (See below)
  yield wrappedFunction();

  console.log('--- aa end ---');

  // When return is called in Generator,
  // a function specified to aa.then() will be executed.
  return "Generator finished.";

  // When a reject function is called in any of Promises,
  // the fucntion which is specified in aa.error() will be executed.
  yield Promise.reject("An error happened.");

}).then(function(value){
  console.log('--- then start ---');
  console.log(value);

}).catch((error) => {
  console.log('--- error start ---');
  console.log(error);
});

// Since aa doesn't have a feature equivalent to co.wrap,
// we have to make a function which returns aa(function*(){}).
var wrappedFunction = function() {
  return aa(function* () {
    console.log('--- wrap start ---');

    var response = yield [
      promisifiedObject.funcAsync('wrap two', 800),
      promisifiedObject.funcAsync('wrap one', 600),
    ];
    console.log("wrap response: " + JSON.stringify(response));
    yield promisifiedObject.funcAsync('wrap three', 200);
    yield promisifiedObject.funcAsync('wrap four', 400);

    console.log('--- wrap end ---');

    return yield Promise.resolve(null);
  });
};

Result

$ node aa_generator.js
--- aa start ---
aa one
aa two
response: ["aa two","aa one"]
aa three
aa four
--- wrap start ---
wrap one
wrap two
wrap response: ["wrap two","wrap one"]
wrap three
wrap four
--- wrap end ---
--- aa end ---
--- then start ---
Generator finished.

Reference

Heroku Free DynoのSleepを防止する

Herokuでは月に1000時間の稼働稼働枠がもらえますが、無料プランでは30分アプリにアクセスがないとアプリがSleep状態になってしまいます。New Relicアドオンを使って定期的にリクエストを送信することでアプリがSleep状態になることを防げますので、設定手順をご紹介します。

New Relicアドオンのセットアップ

# Herokuにログインする
$ heroku login
# New Relicアドオンを追加する(wayneは無料プランの名称)
$ heroku addons:add newrelic:wayne -a {app name}
# New Relic設定画面をブラウザで開く
$ heroku addons:open newrelic -a {app name}

New Relicの設定

最初に表示されるプロダクト選択画面で「SYNTHETICS」を選択する。

モニターの作成画面で以下を入力する。

(1) Choose your monitor type:Ping

(2) Enter the details

  • First, name your monitor:(適当な名前を付ける)
  • Enter a URL:(HerokuアプリのURLを入力する。アプリにリクエストが送信されればエラーが返却されても問題ないので https://{app name}.herokuapp.com/ などでよい。)

(3) Select monitoring locations

  • どのロケーションを選択しても大差はないと思うので適当に選択すればよい。

(4) Set the schedule:15min

  • 30分より短く設定する必要があるため。

Procedure to Print with Google Cloud Print API

Recently printers connected to the Internet became common. As some of my web services required printing in the background process, I have researched Google Cloud Print API as one of printing measures.

(0) Get a client ID and a client secret in Google API Console

(1) Show an authorization page and get a grant from the user.

https://accounts.google.com/o/oauth2/v2/auth?
redirect_uri={registered redirect URI}&
response_type=code&
client_id={issued client ID}&
scope=https%3A%2F%2Fwww.googleapis.com%2Fauth%2Fcloudprint&
access_type=offline

(2) Receive an authorization code in the redirect URI and exchange it for an access token.

  • The browser will be redirected to the redirect URI with an authorization code in the code parameter.
  • Send the authorization code extracted from the URI to the token endpoint and get an access token.
Request

POST https://www.googleapis.com/oauth2/v4/token
Content-Type: application/x-www-form-urlencoded

code={authorization code}&
client_id={issued client ID}&
client_secret={issued client secret}&
redirect_uri={registered redirect URI}&
grant_type=authorization_code

Response

{
  "access_token": {access token},
  "token_type": "Bearer",
  "expires_in": 3600,
  "refresh_token": {refresh token}
}

(3) Call the printer search API and get the printer ID.

Request

GET https://www.google.com/cloudprint/search
Authorization: OAuth {access token}

Response

{
 "printers": [
 {
  "id": {printer ID},
  "displayName": {display name of the printer},
  ...
 }]
  ...
}

(4) Call a printer job submit API and execute printing

  • e.g.) a request to print the web page by specifying a URL
POST https://www.google.com/cloudprint/submit
Content-Type: application/x-www-form-urlencoded

printerId={printer ID}&
title={print title}&
contentType=url&
content={URL to print}&
ticket={ticket object}
{"version":"1.0","print":{"vendor_ticket_item":[],"color":{"type":"STANDARD_MONOCHROME"},"copies":{"copies":1}}}

Reference

MongoDB Node.js Driver Connection Management

Points

  • Call MongoClient.connect only once, and reuse the instance.
  • Connection management is done by the driver and the number of connections can be specified in the option of MongoClient.connect.

Sample Code

  • db.js
// Keep the mongoDB connection while the application is running.
var db = null;
module.exports.initialize = co.wrap(function*() {
    db = yield MongoClient.connect("mongodb://...");
});

module.exports.getById = co.wrap(function*(id) {
var col = db.collection("collection");
    var row = yield col.findOne({_id:id});
    return row.property;
});
  • app.js
var db = require('./db');

co(function*(){
    db.initialize();
    var result = db.getById(0);
    ...
});

Reference

アメリカで購入できる胃薬

胃が弱いのでよく胃薬にお世話になります。 アメリカに来た当初は何を買えばよいかわからなかったので、定番を調べてみました。

  • Tums

    • 気軽に飲める制酸剤。カルシウムの補給用途にも使える。
  • Zantac

    • H2ブロッカーという胃酸分泌を抑制する薬。
    • 日本の薬局で購入できるガスター10と成分は異なるが同様の効果。
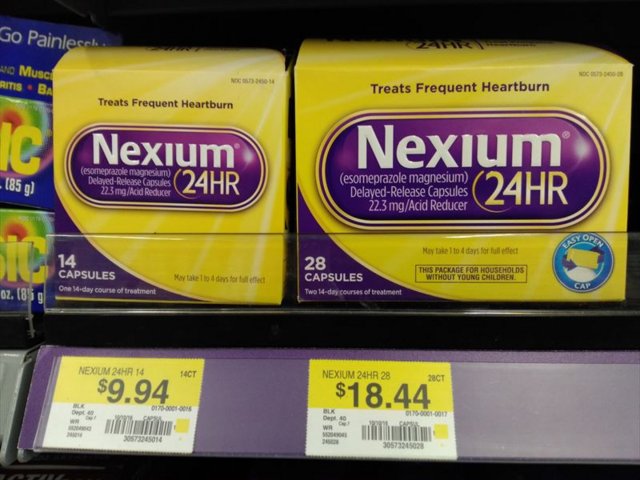
  • Nexium

  • Gax-X

    • 腹部膨満時に利用する消泡剤。
    • 日本でよく処方されるガスコンに似た成分が入っている。